How To Clean A Bathroom Extractor Fan Without Removing It
Learning how to clean a bathroom extractor fan without removing it saves time and keeps your ventilation system running efficiently. This simple maintenance task requires minimal tools and can be completed in about 15-20 minutes. Regular cleaning prevents dust buildup, reduces noise, and extends the lifespan of your fan while maintaining proper airflow in your bathroom.
Why This Matters
Bathroom extractor fans accumulate dust, moisture, and grime over time, which reduces their effectiveness at removing humidity and odors. A dirty fan has to work harder to circulate air, leading to increased energy consumption and potential motor burnout. The accumulated dust also becomes a breeding ground for mold and bacteria in the humid bathroom environment.
When your fan runs loudly or doesn’t seem to pull air effectively, dust buildup is often the culprit. Cleaning it regularly without full removal prevents these issues and maintains healthy air quality. Most fans don’t need complete disassembly for routine maintenance, making this an accessible task for any homeowner.
Tools & Materials List
- Vacuum cleaner with brush attachment
- Microfiber cloths (2-3)
- Mild dish soap or all-purpose cleaner
- Warm water in a bowl
- Small soft brush or old toothbrush
- Step stool or ladder
- Flashlight or headlamp
- Screwdriver (if cover removal is needed)
Step-by-Step Instructions
1. Turn Off the Power
Switch off the fan at the wall switch and, for added safety, turn off the circuit breaker controlling the bathroom. This prevents accidental activation while you’re cleaning.
2. Remove or Open the Cover
Most bathroom fan covers simply pull down with gentle pressure or have clips that release. Some models require unscrewing 1-2 screws. Once the cover is detached, set it aside for separate cleaning.
3. Vacuum Loose Dust
Using the brush attachment on your vacuum, carefully remove loose dust from the fan blades, housing, and surrounding areas. Work gently to avoid damaging the blades. This step removes the bulk of debris quickly and efficiently.
4. Clean the Fan Blades
Dampen a microfiber cloth with your cleaning solution (avoid soaking it) and wipe each blade individually. For stubborn grime, use the soft brush to gently scrub. Rotate the blades manually to access all sides, being careful not to bend them.
5. Clean the Housing
Wipe down the interior housing and motor casing with your damp cloth. Don’t spray liquid directly into the unit or onto the motor. Focus on visible surfaces and the areas where dust accumulates around the motor mount.
6. Clean the Cover
Wash the cover separately in warm soapy water or wipe it thoroughly with your cleaning cloth. Dry it completely before reattaching to prevent moisture from entering the fan housing.
7. Reassemble and Test
Once everything is dry, reattach the cover by snapping it back into place or replacing any screws. Restore power and turn on the fan to ensure it operates smoothly and quietly.
Natural Alternatives
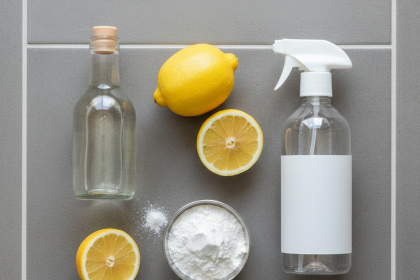
For those preferring natural cleaning solutions, a mixture of white vinegar and water (1:1 ratio) works excellently for cutting through grime without harsh chemicals. The vinegar naturally disinfects and deodorizes while being safe around electrical components when used sparingly on cloths.
Another effective option is using baking soda paste for stubborn spots. Mix baking soda with a small amount of water to create a gentle abrasive that won’t scratch surfaces. Apply with your soft brush, then wipe clean with a damp cloth. These natural alternatives are particularly beneficial for households sensitive to chemical cleaners.
Troubleshooting
If your fan still runs loudly after cleaning, the motor bearings may need lubrication or the fan could be unbalanced from bent blades. Straighten any warped blades gently with your fingers, ensuring they’re evenly spaced.
When the fan doesn’t pull air effectively even after cleaning, check for blockages in the exterior vent or ductwork. Sometimes lint and debris accumulate in the exhaust path. If vibration persists, ensure the cover is properly secured and all mounting screws are tight.
For fans that won’t turn on after cleaning, verify you’ve restored power at both the switch and breaker. Double-check that no moisture remains near electrical connections before energizing the system.
Prevention & Maintenance Tips
Clean your bathroom extractor fan every 3-6 months to prevent heavy buildup. Running the fan for 15-20 minutes after showers reduces moisture accumulation on components. Keep your bathroom door slightly open during fan operation to improve airflow efficiency.
Wipe the visible cover monthly with a dry cloth to minimize dust entering the unit. This quick habit significantly reduces the frequency of deep cleaning. For more comprehensive maintenance guidance, check out our complete guide on How To Clean Bathroom Fan.
Keeping Your Fan Fresh
Regular cleaning of your bathroom extractor fan without removing it maintains optimal performance and air quality. This straightforward maintenance task prevents costly repairs and ensures your bathroom stays properly ventilated. With these simple techniques for how to clean a bathroom extractor fan without removing it, you can tackle this project confidently whenever needed.