
(Your cornerstone guide to mastering how to clean fish tank gravel and maintain long-term aquarium health.)
Overview & Definition
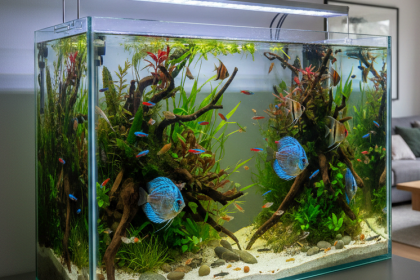
A clean and well-maintained aquarium substrate is the foundation of a healthy tank environment. When people talk about how to clean fish tank gravel, they’re actually touching one of the most important aspects of aquarium care: managing waste, supporting beneficial bacteria, and keeping the ecosystem stable. Substrate isn’t just “rocks at the bottom”; it’s a living biological layer that affects water clarity, nutrient balance, fish stress levels, and even plant growth.
Dirty gravel traps leftover food, fish waste, and organic debris. If unmanaged, these break down into ammonia and nitrite—two compounds that are highly toxic to fish. Consistent cleaning prevents spikes in dangerous parameters, reduces algae blooms, and keeps the tank visually appealing. Gravel maintenance also ensures that your filtration system doesn’t become overloaded and that the nitrogen cycle stays functional.
This pillar guide provides a complete, authoritative overview of substrate care for all tank types—beginner setups, planted aquariums, community tanks, and even high-tech environments. For specific cleaning methods, troubleshooting situations, and step-by-step techniques, you can explore the child articles linked throughout this guide.
The Core Components (Biological, Chemical, Mechanical)
A clean substrate works hand-in-hand with the three major pillars of aquarium health. Understanding these concepts helps you make informed decisions about maintenance techniques.
Biological Stability
Gravel and substrate are home to colonies of beneficial bacteria, especially Nitrosomonas and Nitrospira. These bacteria convert toxic ammonia → nitrite → nitrate through the nitrogen cycle. Disturbing the substrate too aggressively can wipe out these colonies and destabilize your tank.
Key points:
- Beneficial bacteria live on surfaces, not in the water column.
- Gravel vacuuming must be controlled—not overly aggressive.
- Deep cleaning should be spaced out to protect bacterial balance.
Chemical Balance
Your substrate influences pH, hardness, and nutrient levels. For example:
- Crushed coral raises water hardness.
- Soil substrates release nutrients for plants.
- Inert gravel does not alter chemistry but still accumulates waste.
Maintaining chemical stability means ensuring debris doesn’t decompose fast enough to cause ammonia spikes.
Mechanical Filtration & Flow
Filtration systems mechanically remove debris so it doesn’t settle permanently into the substrate. A strong mechanical stage (filter floss, sponges, pads) paired with appropriate flow prevents detritus from sinking deep into the gravel.
Good flow keeps waste suspended long enough for the filter to catch it before it settles.
Essential Maintenance Schedule (The How-To)
Below is a practical schedule you can follow to maintain substrate cleanliness without harming your tank’s ecological balance.
Daily Tasks
- Visually check substrate for uneaten food.
- Remove leftover pellets or flakes with a feeding stick or net.
- Observe fish waste accumulation on the gravel surface.
Weekly Tasks
These are your core cleaning actions.
1. Light Gravel Vacuuming (20–30% Water Change)
- Use a siphon gravel vacuum.
- Press the vacuum head gently into the gravel.
- Let debris rise while gravel falls back.
- Focus only on ⅓–½ of the tank each week to protect bacteria.
2. Glass & Surface Debris Removal
- Clean algae from glass so debris doesn’t fall back into the substrate.
3. Filter Floss Rinse
- Rinse mechanical pads in old tank water to restore flow and reduce waste on the gravel.
Monthly Tasks
These deeper tasks keep the substrate long-term healthy.
1. Rotational Deep Gravel Cleaning
- Every month, clean a different section deeply.
- Avoid cleaning the entire substrate in one session.
- Prevent bacterial colony collapse.
2. Replanting or Substrate Stirring (Planted Tanks)
- Lift uprooted plant roots to remove trapped gas pockets.
- Trim overgrown plants that shed debris onto the substrate.
3. Equipment Check
- Inspect siphons, hoses, and filters for blockages.
- Remove buildup that may cause debris to settle unevenly.
This schedule keeps the tank clean without shocking its ecosystem.
Deep Dive: Filtration Systems and Media
Filtration directly affects how dirty your substrate becomes. A strong, well-maintained filter prevents waste from sinking into the gravel in the first place.
Hang-On-Back (HOB)
- Easy to maintain.
- Suitable for beginner tanks.
- Good mechanical and chemical filtration.
Canister Filter
- High flow rate.
- Great for larger tanks.
- Excellent for reducing debris buildup on gravel.
Sump System
- Best for large or heavily stocked aquariums.
- Allows massive biological media capacity.
- Provides stable water parameters and oxygenation.
Media Types
Mechanical Media
- Filter floss, sponges, pads.
- Removes debris before it reaches the gravel.
Chemical Media
- Activated carbon, Purigen, zeolite.
- Controls dissolved waste that gravel may trap.
Biological Media
- Ceramic rings, bio-balls, sintered glass.
- Supports large bacterial colonies, reducing toxin buildup within substrate.
A high-quality filter means less substrate maintenance overall.
Deep Dive: Understanding Water Quality Testing
Testing water is the easiest way to know whether your substrate cleaning routine is working.
Ammonia (NH₃)
- Ideal: 0 ppm
- Presence indicates decaying waste in substrate.
Nitrite (NO₂⁻)
- Ideal: 0 ppm
- Shows incomplete cycling or heavy substrate disturbance.
Nitrate (NO₃⁻)
- Ideal: < 20 ppm for freshwater
- High nitrate indicates debris accumulation in gravel.
pH
- Varies based on fish species, but stability is key.
Regular testing gives early warning before substrate problems become dangerous.
Troubleshooting & Specific Tasks: When You Need Expert Help
(Internal Linking Hub)
This is where general knowledge ends and specific cleaning scenarios begin. Many aquarium owners face unique challenges tied directly to their substrate. Below are the most common situations—each one leading to a dedicated deep-dive guide for precision help.
- If you prefer a manual method, explore How to Clean Fish Tank Gravel by Hand.
- When you have no vacuum available, use the techniques in How to Clean Gravel in Fish Tank Without Vacuum.
- If algae has taken over your substrate, the steps in How to Clean Fish Tank Gravel Algae will help you restore clarity.
- To disinfect or reset a tank, see How to Clean Fish Tank Gravel with Vinegar.
- When preparing new gravel, refer to How to Clean Aquarium Gravel Before Use.
- If you’re working without tools, the guide How to Clean a Fish Tank With No Equipment provides safe alternatives.
- For planted tanks, where substrate holds nutrients and root systems, follow How to Clean Planted Aquarium Substrate.
- And if you use an electric vacuum, check Electric Aquarium Gravel Cleaner: How to Use It Properly for correct setup and technique.
Each child guide provides precise, scenario-based instructions tailored to your tank’s needs.
Initial Setup & Checklist for Beginners
A clean substrate begins before you even fill the tank. Here’s a simple checklist:
- Pre-rinse all gravel or substrate thoroughly.
- Use a proper gravel depth: 5–7 cm for most tanks.
- Install a filter rated for 2× your tank volume.
- Add water conditioner to remove chlorine.
- Cycle the tank for 2–4 weeks before adding fish.
- Use a water test kit (liquid test preferred).
- Add fish slowly to avoid overwhelming the bacterial system.
- Keep a gravel vacuum and algae scraper in your maintenance kit.
Final Thoughts & Continuing Your Journey
Mastering how to clean fish tank gravel is a long-term investment in your aquarium’s stability and beauty. Clean substrate supports healthy fish, clearer water, and a thriving ecosystem. To continue learning, explore the dedicated child guides linked throughout this article—they offer step-by-step instructions for every cleaning scenario you’ll ever face.