How To Clean In Between The Glass On An Oven
Learning how to clean in between the glass on an oven might seem daunting, but it’s a manageable DIY task that can restore your oven door’s clarity. That grimy buildup trapped between the panes doesn’t just look unsightly—it can affect your ability to monitor cooking progress. This guide walks you through the complete disassembly and cleaning process to get your oven door looking brand new again. For additional tips on maintaining the entire door surface, check out our guide on How To Clean Oven Door.
Why This Happens
The grime between oven door glass panels accumulates from steam, grease vapors, and food particles that escape through tiny gaps during cooking. Modern ovens typically feature double or triple-paned glass for insulation, but these aren’t completely sealed units. Over time, moisture-laden air carries microscopic grease particles into the space between panes.
High-heat cooking methods like broiling or roasting fatty meats accelerate this buildup. The heat causes grease to vaporize, and these vapors find their way into any available space. Once inside, they condense on the cooler inner glass surfaces, creating stubborn streaks and spots that can’t be reached with regular cleaning.
Tools & Materials List
- Screwdriver set (Phillips and flathead)
- Clean towels or soft cloths
- Dish soap or glass cleaner
- Warm water
- Vacuum with hose attachment (optional)
- Soft-bristled brush or old toothbrush
- Camera or smartphone (for reference photos)
Step-by-Step Instructions
Step 1: Prepare and Document
Unplug your oven or turn off the circuit breaker for safety. Open the oven door fully and take reference photos of the hinge mechanisms and screw locations. This documentation will be invaluable during reassembly.
Step 2: Remove the Oven Door
Locate the hinge locks on both sides of the door—these are usually small metal clips. Flip them toward you to unlock. Close the door partially to about 45 degrees, then lift it straight up and out. Have someone help you, as oven doors can be heavy.
Step 3: Disassemble the Door Panels
Lay the door face-down on a protected surface with towels underneath. Remove the screws around the door’s perimeter—typically along the top and sides. Keep all hardware organized in a small container. Carefully separate the outer frame from the glass panels.
Step 4: Separate the Glass Panels
Most oven doors have two to four glass panes held together by clips or brackets. Gently lift each panel away, noting their exact order and orientation. Take photos if needed. Some panels may have rubber gaskets or spacers—keep these safe.
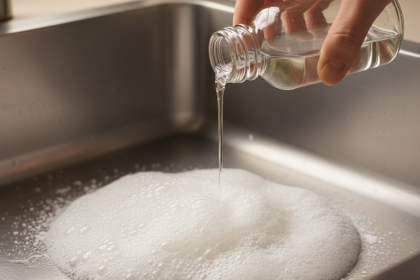
Step 5: Clean Thoroughly
Mix warm water with dish soap and clean each glass panel individually using soft cloths. For stubborn grease, let soapy water sit on the surface for a few minutes before wiping. Use a soft brush for any baked-on residue. Clean both sides of every panel and let them dry completely.
Step 6: Vacuum the Interior
Before reassembly, vacuum any crumbs or debris from the door frame cavity. This prevents future buildup and ensures proper panel seating.
Step 7: Reassemble the Door
Stack the glass panels in reverse order, ensuring they’re positioned exactly as they were originally. Replace all clips and brackets. Reattach the outer frame and secure all screws firmly but without overtightening.
Step 8: Reinstall the Door
Align the hinges with their slots in the oven frame at a 45-degree angle. Slide the door down into place, open it fully, then flip the hinge locks back to their original position.
Natural Alternatives
For an eco-friendly cleaning solution, combine equal parts white vinegar and water in a spray bottle. This natural mixture cuts through grease effectively without harsh chemicals. Spray generously on the glass panels and let it sit for five minutes before wiping clean.
Baking soda paste also works wonderfully for stubborn spots. Mix three parts baking soda with one part water to create a thick paste. Apply to problem areas, let it sit for 10-15 minutes, then gently scrub with a damp cloth. These natural options are safe, inexpensive, and readily available in most kitchens.
Troubleshooting
Streaks remaining after cleaning: This usually means residue is still present. Re-clean with fresh cleaning solution and finish with a dry microfiber cloth using circular motions.
Door won’t close properly: Check that all glass panels are seated correctly and in the right order. Ensure no gaskets or spacers were left out during reassembly. The panels must sit flush within their frames.
Screws won’t align: You may have reversed the glass panel orientation. Refer to your reference photos and ensure each pane faces the correct direction—some have coatings that must face specific ways.
Prevention Tips
Regular external cleaning reduces the amount of grease vapor that penetrates between panels. Wipe down your oven door after messy cooking sessions, especially after roasting or broiling. Use splatter guards when cooking fatty foods to minimize airborne grease.
Run your oven’s self-cleaning cycle periodically if equipped—the high heat helps vaporize some residues before they accumulate. Ensure your kitchen has adequate ventilation to reduce moisture and grease buildup throughout your cooking space.
Final Thoughts
Now that you know how to clean in between the glass on an oven, you can maintain crystal-clear visibility and a professional-looking kitchen. While this task requires some disassembly, the results are well worth the effort. With proper care and occasional deep cleaning, your oven door will remain spotless for years to come.