How To Remove Thick Grease From An Exhaust Fan
If you’re wondering how to remove thick grease from an exhaust fan, you’re likely dealing with a sticky, stubborn buildup that regular cleaning methods won’t tackle. Kitchen exhaust fans accumulate layers of grease over time, reducing their efficiency and creating potential fire hazards. This comprehensive guide will walk you through effective methods to restore your exhaust fan to pristine condition using household products and simple techniques.
Why Grease Builds Up On Exhaust Fans
Exhaust fans in kitchens pull cooking vapors, smoke, and airborne grease particles away from your cooking area. As hot air passes through the fan, grease condenses on cooler surfaces like the fan blades, housing, and filters. Over time, these thin layers accumulate into thick, hardened deposits.
This buildup doesn’t just look unsightly—it significantly reduces your fan’s effectiveness by restricting airflow. The motor has to work harder, shortening its lifespan and increasing energy consumption. More importantly, thick grease accumulation poses a fire risk when exposed to heat from your stovetop. Regular removal is essential for both safety and performance.
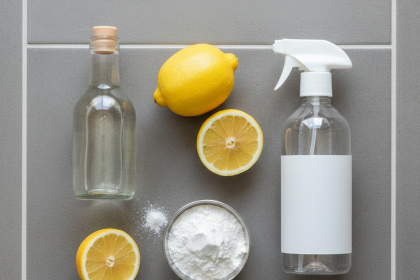
Tools & Materials You’ll Need
- Dish soap (degreasing formula)
- Baking soda
- White vinegar
- Large bucket or sink
- Hot water
- Scrub brush or old toothbrush
- Non-abrasive sponge
- Microfiber cloths
- Plastic scraper or old credit card
- Rubber gloves
- Step ladder (if needed)
Step-by-Step Cleaning Instructions
1. Turn Off Power and Remove Components
Switch off the exhaust fan at the circuit breaker for safety. Remove the filters, fan cover, and any detachable parts according to your fan’s manual. If you’re also maintaining other ventilation systems, similar principles apply when you clean bathroom fans.
2. Pre-Scrape Excess Grease
Use a plastic scraper to gently remove the thickest grease layers from filters and fan blades. Work over newspaper or paper towels to catch falling debris. This step makes the soaking process much more effective.
3. Prepare Your Degreasing Solution
Fill your sink or a large bucket with very hot water. Add a generous squirt of degreasing dish soap and half a cup of baking soda. Mix thoroughly until the baking soda dissolves completely.
4. Soak the Components
Submerge filters, fan blades, and removable parts in the solution. Let them soak for 20-30 minutes for moderate buildup, or up to an hour for extremely thick grease. The hot water softens the grease while the soap breaks down its molecular bonds.
5. Scrub Away Loosened Grease
After soaking, use a scrub brush to work on stubborn areas. For intricate parts or mesh filters, an old toothbrush works perfectly. Apply firm but gentle pressure to avoid damaging components. If grease remains, create a paste with baking soda and water, apply it directly, and scrub again.
6. Vinegar Rinse for Shine
Rinse all parts thoroughly with hot water. For a final deep clean that cuts through any remaining residue, spray or wipe surfaces with white vinegar. Let it sit for 2-3 minutes, then rinse again with clean water.
7. Clean the Housing
While parts soak, clean the exhaust fan housing still mounted on your wall or ceiling. Spray the degreasing solution onto surfaces and wipe with a sponge. Use your scraper for stubborn spots, being careful around electrical components.
8. Dry and Reassemble
Dry all components completely with microfiber cloths or let them air dry for several hours. Any moisture left behind can attract dust. Once everything is completely dry, reassemble your exhaust fan and restore power.
Natural Cleaning Alternatives
If you prefer avoiding commercial products, steam cleaning offers an effective chemical-free method. Hold a steam cleaner near greasy surfaces to soften buildup, then wipe away. Another option is a lemon juice and salt paste—the citric acid cuts grease naturally while salt provides gentle abrasion.
For regular maintenance, ammonia solution (one part ammonia to four parts water) works exceptionally well. Soak components for 15 minutes in a well-ventilated area, then rinse thoroughly. The alkaline properties of ammonia dissolve grease quickly without harsh scrubbing.
Troubleshooting Common Problems
Grease won’t budge after soaking: Try increasing water temperature or extending soak time. You can also add a tablespoon of ammonia to your cleaning solution for extra degreasing power.
Discoloration remains after cleaning: This is often oxidation rather than grease. While it doesn’t affect function, you can minimize it with a paste of cream of tartar and water.
Fan still struggles after cleaning: Check that the motor vents aren’t blocked and that the fan spins freely. Accumulated grease may have reached the motor housing, requiring professional servicing.
Keeping Your Exhaust Fan Grease-Free
Prevention is far easier than deep cleaning. Clean your exhaust fan filters monthly if you cook frequently, or every two months for light use. A quick wash with dish soap prevents heavy accumulation.
Run your exhaust fan for 5-10 minutes after cooking to ensure all grease-laden air is expelled. Wipe down visible surfaces weekly with a damp cloth to catch grease before it hardens. These simple habits dramatically reduce the need for intensive cleaning sessions.
Get Your Exhaust Fan Working Like New
Learning how to remove thick grease from an exhaust fan transforms a daunting task into a manageable project. With the right soaking techniques and cleaning solutions, even years of buildup can be eliminated. Regular maintenance keeps your kitchen safer, your air cleaner, and your exhaust fan running efficiently for years to come.