
Keeping your tank clear starts with preparing the substrate properly. This guide explains how to clean aquarium gravel before use so your water stays bright, your fish settle comfortably, and your setup looks great from day one. With a few simple tools and the right technique, you can remove dust, debris, and factory residue in minutes—following the same foundational principles covered in the Complete Guide to Cleaning and Maintaining Aquarium Substrates.
Why This Happens / Why This Matters
New gravel always carries leftover particles from the manufacturing and packaging process. These tiny bits of dust, sand, and dye can cloud your tank, make filters work harder, and reduce visibility during the first few days of setup. Even premium gravel isn’t truly “tank-ready” straight from the bag.
Cleaning the gravel properly helps prevent murky water, unexpected color bleed, and debris floating around when you first fill the aquarium. It also ensures a more stable start for your tank’s ecosystem. A clear substrate makes decorating easier, lets you monitor fish behavior, and keeps your initial cycle as smooth as possible.
Tools & Materials List
- Bucket (dedicated for aquarium use)
- Running tap water
- Colander or fine mesh strainer (optional)
- Clean stirring stick or hand scoop
- Towels for drying spills
Step-by-Step Instructions
- Open the bag and inspect the gravel.
Pour a small amount into your hand to check for excess dust or loose dye. This helps you understand how much rinsing you’ll need. - Prepare your rinsing setup.
Place a bucket inside a sink or bathroom area. If you have a fine strainer, position it over the bucket. This makes draining easier and prevents gravel from going down the drain. - Pour in a manageable amount.
Add 2–3 cups of gravel into the bucket at a time. Smaller batches rinse faster and give you better control, especially for coated or colored gravel. - Rinse under running water.
Let cool tap water flow directly onto the gravel. Use your hand or a clean stick to gently stir. You’ll notice cloudy or brownish water pouring off in the first few seconds—this is normal. - Drain and repeat.
Tilt the bucket slowly to pour out the top layer of dirty water while keeping the gravel inside. Rinse again. Repeat until the water turns significantly clearer. Most gravel needs 3–6 rounds depending on dust levels. - Use a colander for faster rinsing (optional).
If your sink has good pressure, pour gravel into a strainer and rinse while shaking gently. This removes dust efficiently, especially for smaller substrate pieces. - Check clarity.
Scoop a handful of rinsed gravel into a clear glass of water. If the water looks clean and bright, your gravel is ready. If it’s cloudy, continue one or two more rinses. - Transfer to the tank.
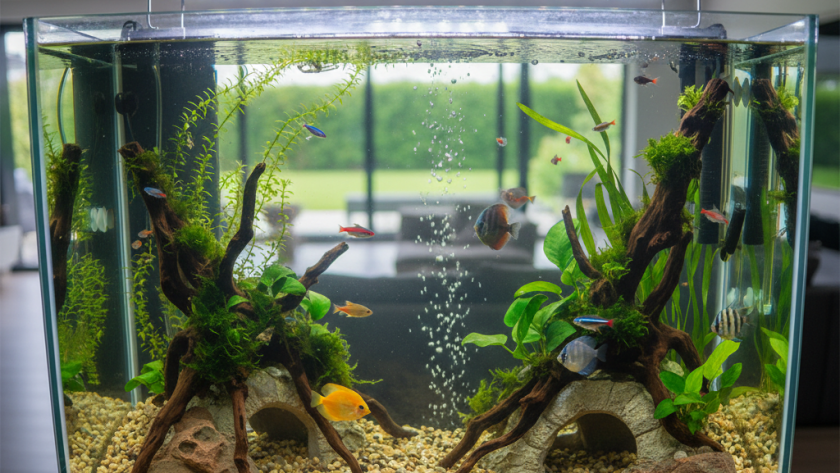
Add the clean gravel directly into your empty aquarium. Spread evenly, then level it out to your preferred depth. Once your base layer is ready, you can begin aquascaping or adding decorations.
Natural / Simple Alternatives
If you want a gentler prep method, you can soak the gravel instead of rinsing it under strong pressure. Fill a bucket with water, add the gravel, stir, and let it settle for 10–15 minutes. The dust will sink to the bottom, making it easier to pour off the dirty water. Repeat soaking until clear.
For extremely fine substrate, swirling the gravel in a mesh bag helps contain small particles. Some aquarists also pre-soak in dechlorinated water to keep everything consistent with the tank’s initial fill. These methods require more time but reduce splashing and keep delicate coatings intact.
Troubleshooting
Water still turns cloudy after rinsing.
Some gravel contains ultra-fine dust that takes longer to remove. Extra rinsing or soaking usually solves it. Cloudiness often clears naturally within a day of filtration.
Colored gravel shows tint in the rinse.
Minor dye runoff is normal. If the water is heavily colored, continue rinsing until the tint decreases.
Gravel feels oily or coated.
Rarely, certain batches have excess residue. Extended rinsing or letting the gravel soak overnight removes most coatings.
Sand-like particles keep escaping.
Use a very fine strainer or mesh bag to prevent small grains from going down the drain.
Prevention / Simple Maintenance Tips
Keeping gravel fresh after setup is easy. Gently stir the substrate during water changes to lift trapped debris, then vacuum using a gravel siphon. Avoid overfeeding—leftover food settles and dirties the base layer faster. Rinse any new plants or decorations before placing them on the substrate to keep particles from mixing back in.
Closing
With the right steps, learning how to clean aquarium gravel before use becomes a quick and satisfying part of setting up your tank. Clean gravel gives you clear water, an attractive layout, and a smoother start for your aquatic environment. Enjoy building your aquarium with confidence from the very first layer.